
Single Needle Chain Stitch
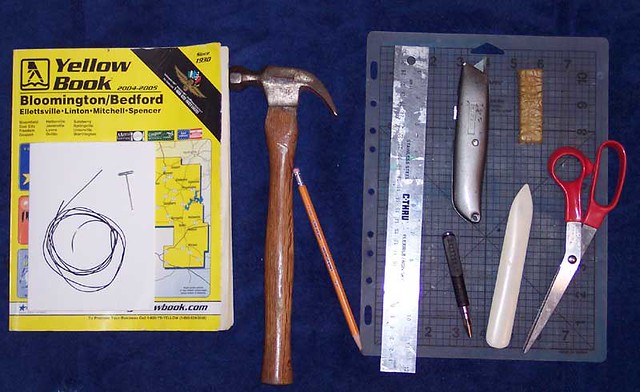
The Tools
bone folder (An Altoids gum tin or the handle of a butter knife will work in a pinch.)
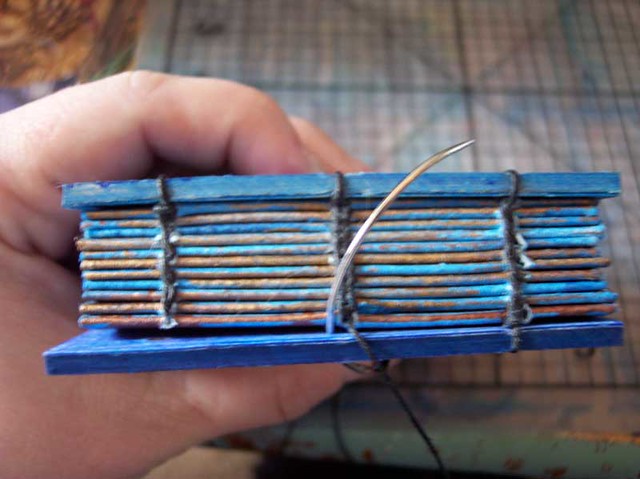
curved tapestry needle (You can use a straight needle, but it’s awkward.)
thread
natural/white beeswax
Stanley or X-acto knife with fresh blades
awl (a thumb tack works well)
1/8″ hole punch
hammer
ruler (I don’t actually measure anything, by you might find it helpful to have a straight edge or ruler handy.)
scissors
cutting mat (Handy for measuring and as a surface to use with hole punch.)
punching cradle (An old telephone book works beautifully.)
pencil
(also paper and front and back covers)
The Paper
Paper grain: If you are using handmade paper, there will be no grain, so you can skip this part.
During manufacturing, commercially made papers are sluiced with water. This orients the paper fibers into parallel alignment, creating “paper grain.” You’ve probably noticed paper grain when trying to tear magazine or newspaper pages. They tear nicely in the direction of the grain, but if you try to tear them across the grain, the paper does not want to cooperate.
Because the paper fibers tend to run in the direction of the grain, they are not as interwoven across the grain. This makes paper weakest in the cross-grain direction. Therefore, when making a book, the grain of the paper should run parallel to the spine of the book. If the grain runs perpendicular to the spine, the paper will tend to stretch and buckle, and the binding will be not be as strong as it could be.
For most commercial text-weight paper (e.g. photocopy or printer paper), the grain will follow the long dimension. This means that you cannot just fold a piece of photocopy paper in half to form 5 � x 8 � inch pages. If you want a book with those dimensions, you will need to start with 11 x 17 inch paper. If you want to use watercolor or drawing paper, you’ll need to determine the direction of the grain yourself, because it could be running either way. One of the simplest ways to determine grain direction is to tear the paper. You will be able to easily tear long, parallel strips from the paper when the tears are parallel to the paper’s grain. If you tear the paper in the opposite direction, you will end up with chunks, as the tears try to turn and follow the grain.
Paper weight: For art journals, I prefer heavy paper. The demo book is made of 140lb Cartiera Magnani watercolor paper. It works well for water media, drawing, and collage. With heavier paper, I include fewer sheets in each signature. Otherwise, the signatures would be too fat. With super heavy paper, or for a book in which I know I’ll be doing a lot of collage work, I usually create one- or two-sheet signatures. When using lighter or text-weight papers, you can use far more sheets per signature.
Dimensions: I determine the dimensions of my paper by folding and tearing it down to size (this is a chance for you to determine the paper’s grain). When I reach a paper size I like, I stop. This will be the size of my text block. This method requires no measuring, so it’s easy and works well for me. For this project, I used scraps left over from making another book, so the size of the scraps determined the size of the demo book’s pages.
I prefer torn paper, but if you wish to cut yours, you can use a Stanley or Xacto knife, or you can have your paper precision cut at a copy center or print shop. If you prefer a refined, finished look, I recommend binding your text block (just the paper, without the covers) by itself, then taking it to a copy center or print shop and having the three cut edges precision trimmed. Then, you can add your covers as a last step.
Fold each sheet of paper individually and firmly run a bone folder along the fold to press it flat. If you’re making a journal out of recycled materials, like paper grocery bags, you can iron the folded sheets.
Next, gather the pages together into signatures.
The Covers
For sketchbooks and journals, I prefer soft covers made out of heavy paper, card stock, mat board, or light-weight davey board. Soft covers are more forgiving if the book becomes overly stuffed with inclusions. For a heavier, stiffer cover, use thicker davey board. You can cover it with fabric, paper, or paint.
Like paper, Davey board has a grain. The grain of the covers should run parallel to the spine. To determine the grain, gently try bending the board in both directions. It will bend easier in the direction of the grain. If you can’t tell by bending, you can cut off a piece and try folding it in each direction. It will fold smoothly in the direction of the grain, but will likely have a bumpy fold across the grain. Failing that, you can cut off a piece of board and wet one side of it. It should curl along the grain (try visualizing a bamboo place-mat: you can roll it along the “grain,” but not against the grain).
As in determining paper size, determining the dimensions for the demo book’s covers is quite easy. Basically, the covers should overhang the pages slightly, in order to protect them. Keep in mind, when measuring, that the covers will be flush with the spine edge of the text block, so you need to add half as much extra width as height. Again, I go with what looks visually pleasing instead of measuring, but 1/16″ to 1/8″ inch is a good rule of thumb.
To cut the covers, lay them on a ruled cutting mat. This makes it easy to cut a perfectly square cover without doing any mathematical gymnastics. Use a straight edge and Stanley or Xacto knife to cut the board. (When cutting paper, mat board, card stock, or davey board, remember to use a fresh blade and change the blade frequently. It will make the job much easier, and will result in nice, clean edges.)
The Sewing Stations
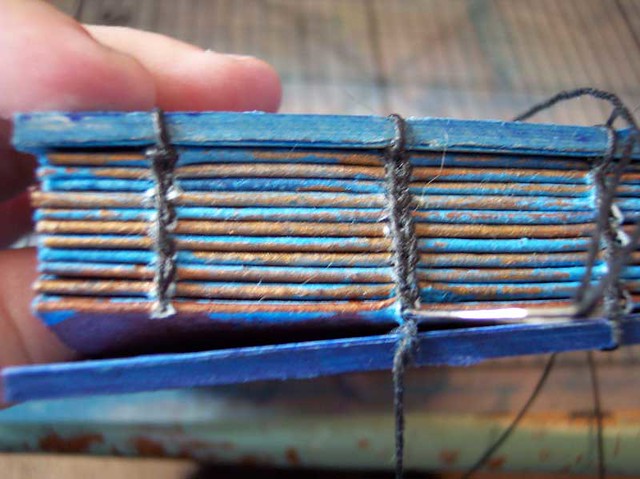
Once your pages are gathered into signatures and your covers are cut, you will need to decide how many sewing stations you want. The demo book has three, evenly spaced along the spine: one in the middle and two a half an inch from the top and bottom edges. On a larger book, you might want to add more stations or arrange them differently.
Cut a piece of scrap paper to the same size as a full sheet of book paper. Fold it in half, so that it resembles a one-sheet signature. This will be your punching template (below). Find the center of the spine edge by folding the paper in half, top-to-bottom (the paper will be folded into quarters at this point). While the paper is folded, decide, visually, how far from the top and bottom edges you want the first and third sewing stations to be located. Mark that point, with your pencil, along the spine. Unfold the paper. Mark the center crease with your pencil. You now have all three sewing stations marked. And, there was no measuring or math involved! (You could use a ruler and math to figure out where to place the sewing stations, but I think placing them where they look good is more important. Plus, I’m terrible at math. I mean, really, really terrible.)
Refold the template so that the marks are on the inside.

Punching Holes
Unfold the punching template and lay it at the center of the first signature. Make sure the edges of all the pages and the template are properly aligned. Lay the signature inside your punching cradle (an old phone book makes a very nice punching cradle). Using an awl, a thumb tack, or a T-pin, punch holes through the folds of the sheets of paper. Remove the signature, double check to make sure the holes went all the way through to the outside, then punch the next signature.
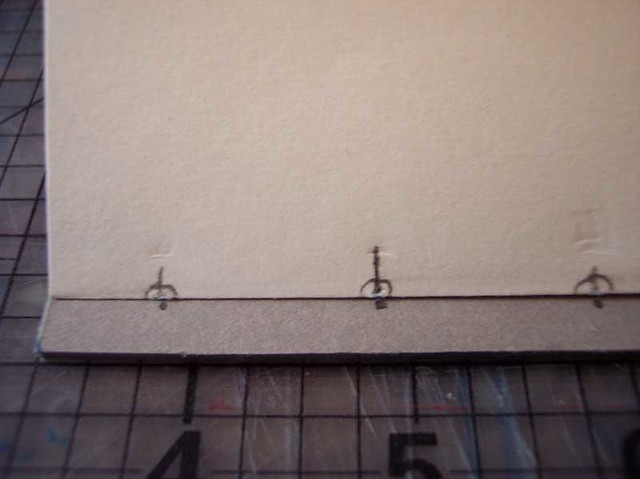
You’ll use the same punching template to determine where to place the holes in your covers (below). Refold it so that the marks are again on the outside. For this, also, I prefer to eyeball instead of measure. I place one cover on my cutting mat, then lay the template on top of it. I visually center it from top to bottom, then decide how far in from the spine edge the holes should be. On the demo book, the centers of the holes are 1/4 inch from the spine edge. If the holes are too close to the spine, they might tear out; if they are too far away, they may be awkward looking. Anything around 1/4 inch will be good, but it is not an exact science. Far more important is to make sure that the line of holes is parallel to the edge.
Mark your holes and use a hole punch and hammer to punch them. Then, place the punched cover on top of the unpunched cover, so that the front cover is on top, facing up, and back cover is on the bottom, facing down, and so that the spine edges are together. Basically, you want the covers to be place relative to each other as they will be on the finished book. Then, mark the unpunched cover through the holes in the punched cover. This way, you can mark the holes so that they are identical, without having to do any measuring. Punch the second set of holes.
Thread
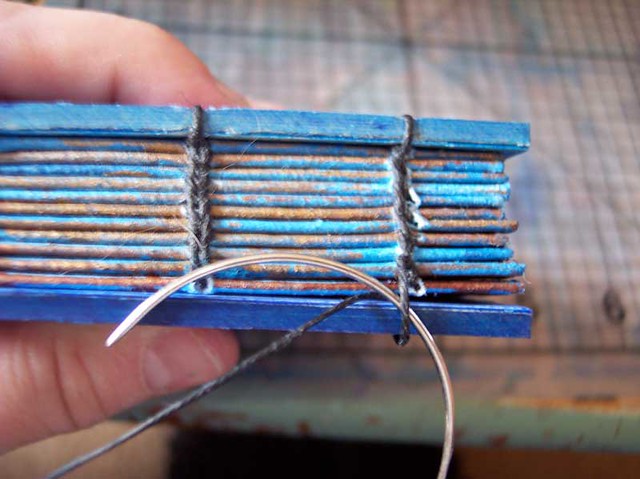
The thicker the thread, the more space there will be between signatures. This is because the thread will be knotted between each signature. The resulting space may seem undesirable at first, but it actually makes the book work better for journaling or collage. Otherwise, you may find that you need to tear out some pages to keep the book from becoming too fat and the spine overly stressed.
[Edit: Leslie Herger points out that this is incorrect, and she’s right. All the knotwork should actually rest above the spine.
What I was getting at is that there will be a certain amount of looseness with this binding–don’t expect the same rigidity or tightness as a case-bound book! This binding shouldn’t be sloppy, but it also shouldn’t be too tight. Getting the tension correct can be a challenge, so I would recommend not using any materials that are precious to you until you’ve made enough practice books to get a good feel for it.]
Cotton or linen thread is a good choice. You can also use other fibers, like embroidery floss, raffia, ribbon, or twine. I’ve experimented with all sorts of fibers to bind books. Sometimes the end result is a flop, but often, it works well. I recommend playing around to see what combinations of materials work for different purposes.
I’ve used commercially waxed linen thread for the demo book, because it’s nice and thick and easy to see. Traditionally, only the ends of the thread are waxed–by drawing them across a block of beeswax–in order to make them easier to thread through the needle. The entire thread may be very lightly waxed if it is prone to tangling. Caveat: If you live in a warm climate, or if you leave your book in a hot car, the wax may melt and mar your book. So, use it carefully and sparingly.
Thread your needle, and you’re ready to start.
Binding

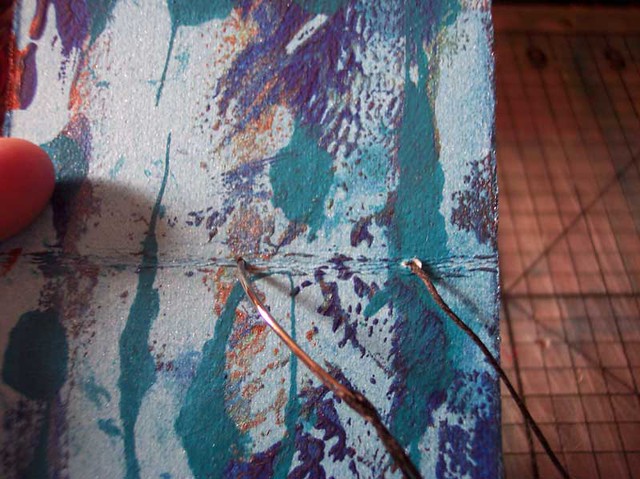
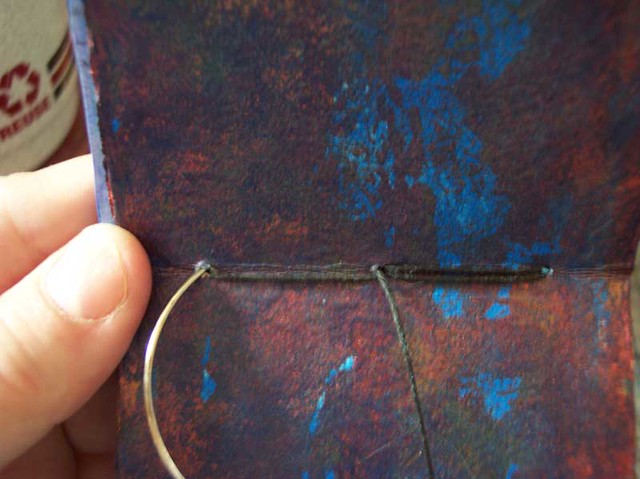
Step 1: Start with the first signature. Open it, and thread your needle through the first hole. Pull the thread through to the outside, leaving a tail. (I leave a short tail, but if you want to add beads or embellishments, a longer tail can be left.)
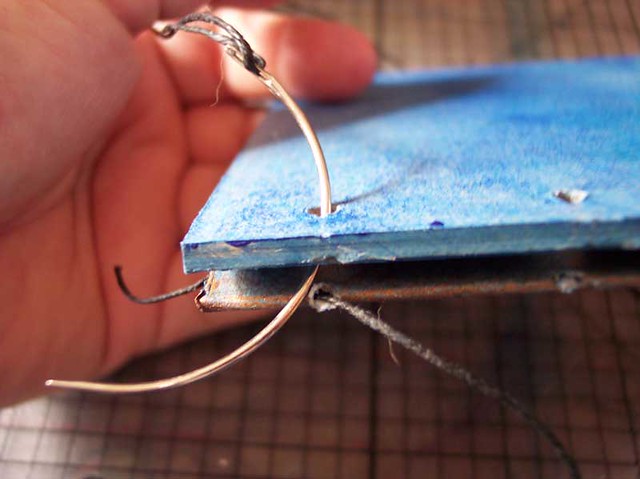
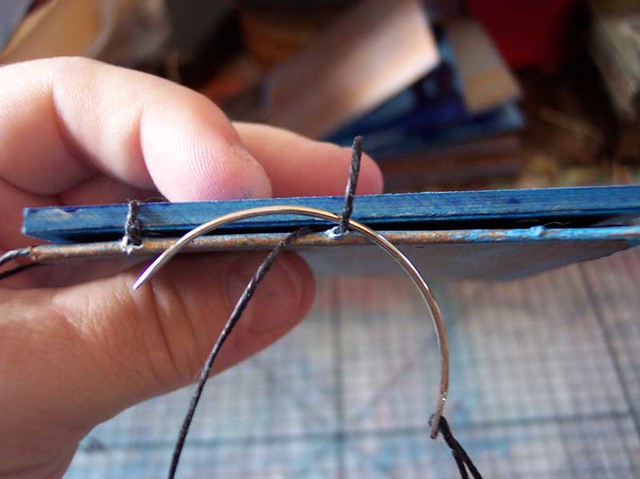
Step 2: Place one of the covers on top of the first signature. Bring the needle around to the outside, then through the first hole and out between the cover and the first signature.

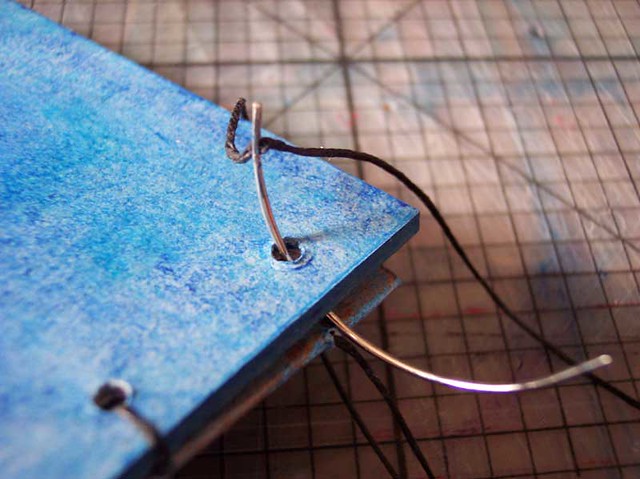
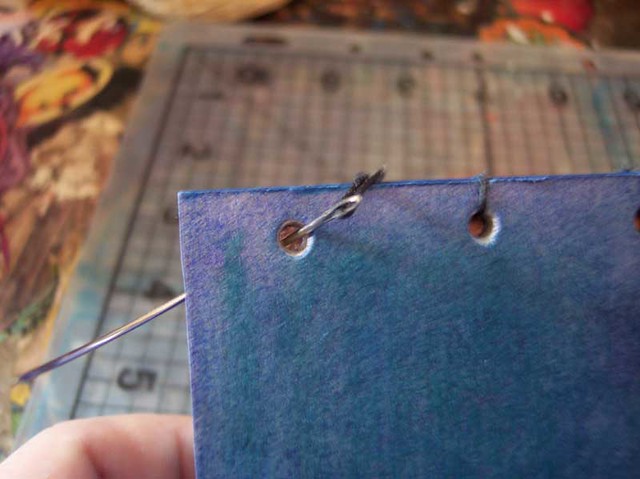
Step 3: Pull most of the thread through, leaving a small loop. Then, pass the needle through the loop, forming a half-hitch knot. Pull the knot snug.

Step 4: Insert the needle back into the first hole. Pull the thread through to the interior of the signature. (The purpose of the knot in the previous step is to keep the thread from pulling all the way through when it is re-inserted into the first hole.

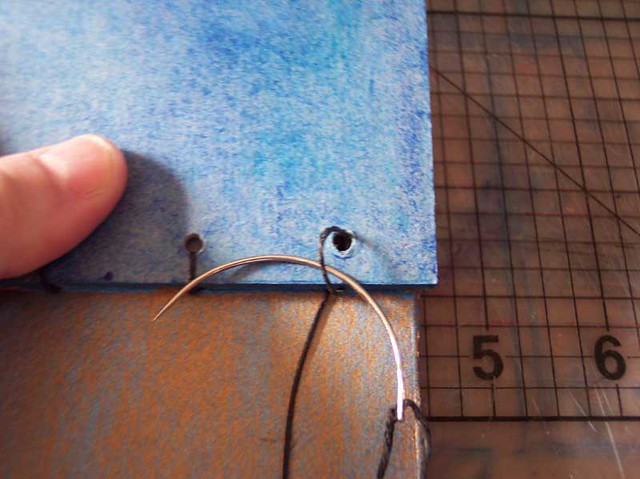
Step 5: Insert the needle into the middle hole. Pull the thread to the outside of the signature.
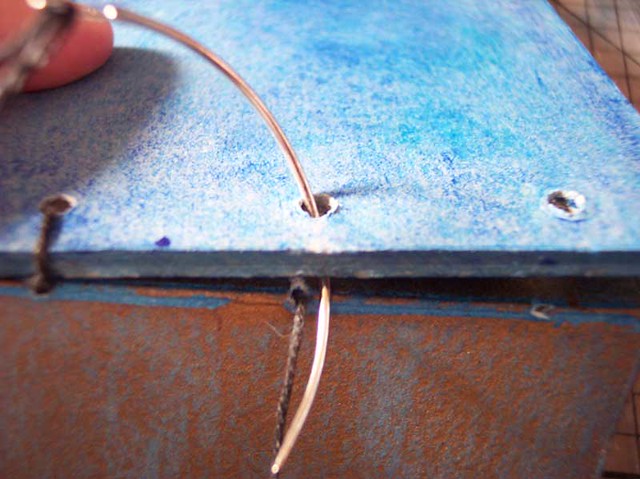
Step 6: Insert the needle into middle hole of the cover, moving from the outside to the inside. Pull most of the thread through, leaving a small loop.
Step 7: Pass the needle through the loop, forming a half-hitch knot. Pull the knot snug.

Step 8: Insert the needle back into the middle hole. Pull the thread through to the interior of the signature.
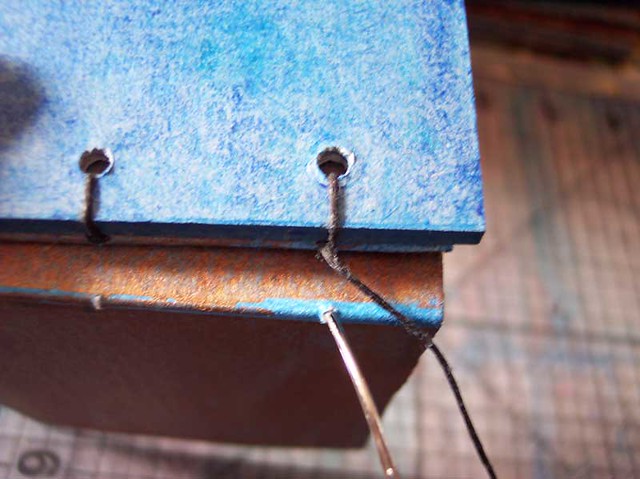
Step 9: Insert the needle into the third hole. Pull the thread through to the exterior of the signature. Pass the thread over the top of the cover and through the third hole, leaving a small loop.
Step 10: Pass the needle through loop, forming a half-hitch knot. Pull knot snug.
Step 11: Place the second signature under the first signature. Insert the needle into the third hole of the second signature. Pull the thread through to the interior of the signature.
Step 12: Insert the needle into the middle hole. Pull the thread through to the exterior of the signature.
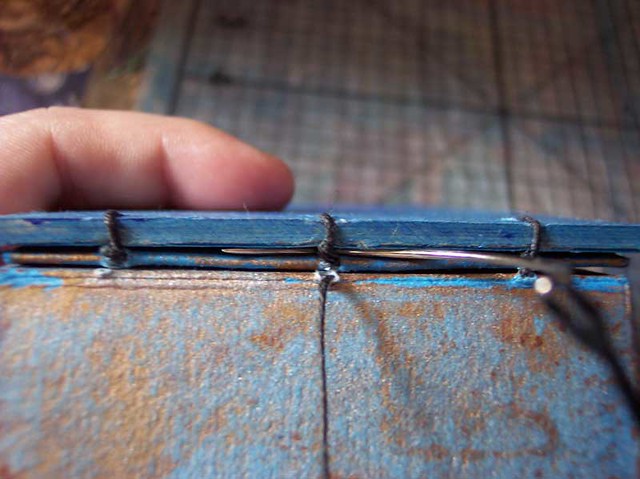
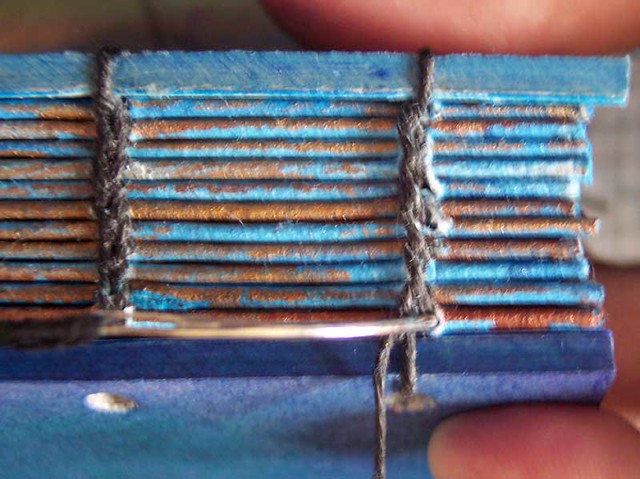
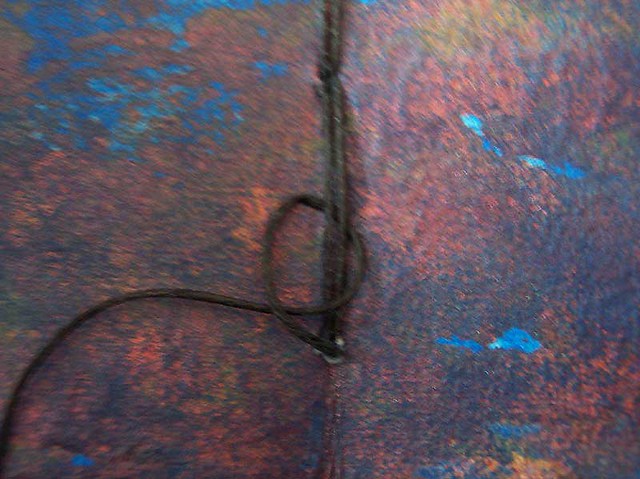
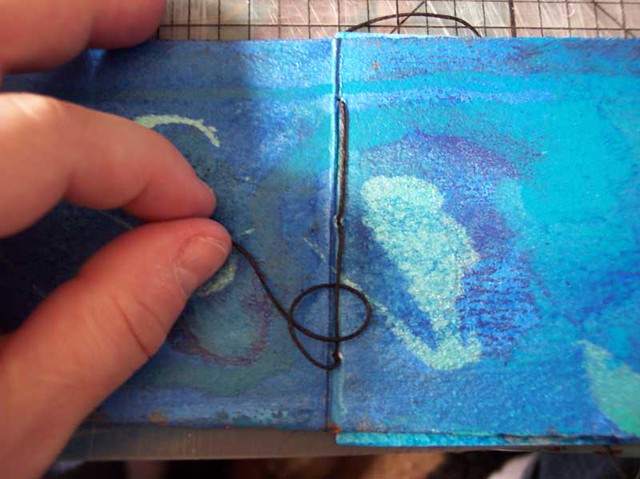
Step 13: Pass the needle–from right to left–under the stitch connecting the first signature to the cover. Pull the thread snug. This will form a chain stitch, knotting the thread.
Step 14: Insert the needle back into the middle hole. Pull the thread snug. Insert the thread into the first hole. Pull the thread to the outside of the signature. Pass the needle under the knot between the first signature and the cover. Pull the thread snug and add the third signature under the second one.
As you add signatures, you will work your way up and down the spine, from right to left and left to right. To secure each stitch, you will pass it under the knot connecting the previous two signatures. For the first two holes in each signature, the thread will pass back into the originating hole in that signature. For the last hole, the thread will exit the originating signature, pass under the knot between the two previous signatures, then skip the originating signature and be inserted into the corresponding hole in the next signature.
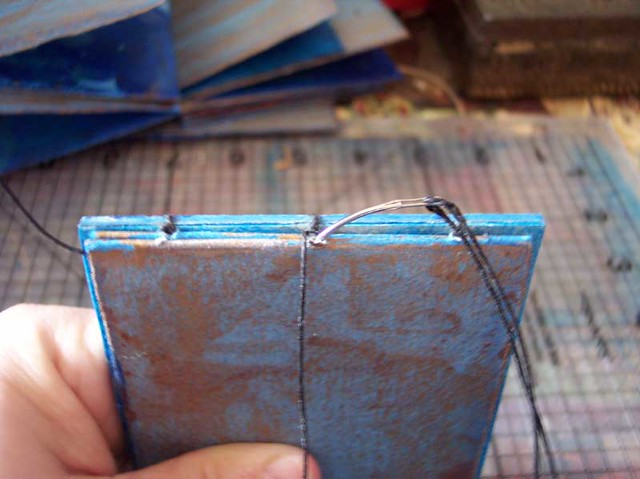
Step 15: When the you finish the last signature, the thread should be passed under the corresponding knot connecting the previous two signatures. Next, place the back cover under the last signature. Pass the needle under the cover, through the hole, and out between the cover and the last signature. Leave a small loop.
Step 16: Pass the needle through the loop, forming a half-hitch knot. Pull the knot snug. Insert the needle back into the originating hole in the last signature. Pull the thread through to the interior of the signature.
Step 17: Insert the needle back into the originating hole in the last signature. Pull the thread through to the interior of the signature. Insert the needle into the middle hole and pass the thread out to the exterior of the signature.
Step 18: Pass the needle through the middle hole in the cover, then out between the cover and the last signature. Leave a small loop.

Step 19: Pass the needle back through the loop, forming a half-hitch knot. Pull the knot snug.
Step 20: Insert the needle back into the middle hole in the last signature. Pull the thread through to the interior of the signature.
Step 21: Insert the needle back into the first hole in last signature. Pull the thread through to the exterior of the signature.
Step 22: Pass the needle through the first hole in the cover, then out between the cover and the last signature. Leave a small loop. Pass the needle through the loop, forming a half-hitch knot. Pull the knot snug. Insert the needle back into the first hole in the last signature.
 \
\
Step 23: Insert the needle back into the first hole in the last signature. Pull the thread through to the interior of the signature.
Step 24: Loop the needle under the binding thread, forming a half-hitch knot. Pull the knot tight and snip the thread.
Step 25: Open the first signature and tie off the leading tail as in step 24, and you’re finished.
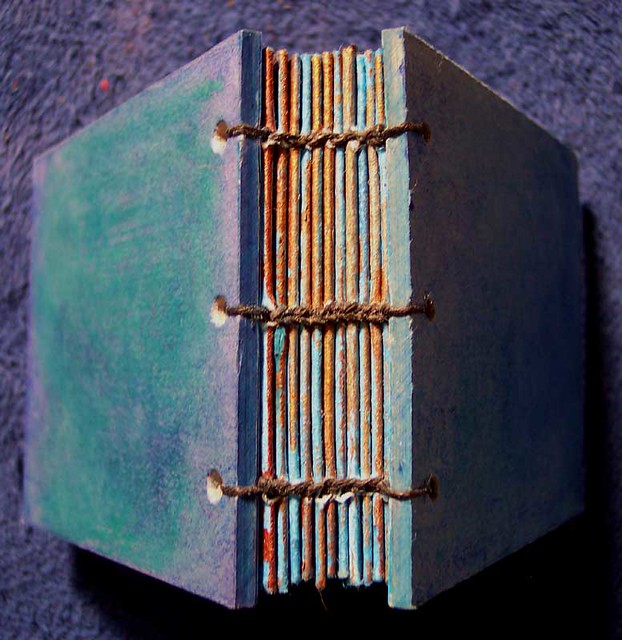
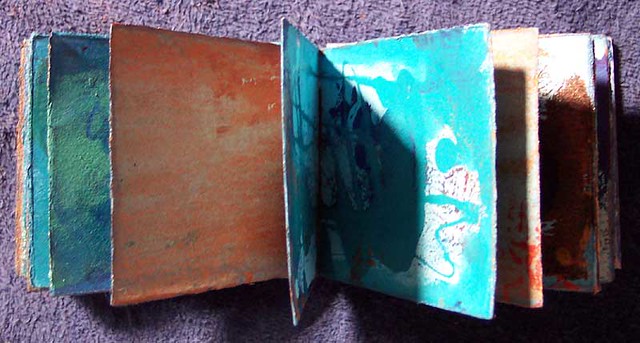

Little Boats
140lb Cartiera Magnani hot press watercolor pages, pre-painted with acrylics, bound with waxed linen thread
3 x 3 3/4 inches
